Maintaining clean and safe drinking water is essential for any household, and a Whirlpool water filter plays a crucial role in achieving that. Over time, these filters can become less effective, making regular replacements necessary. Knowing how to replace a Whirlpool water filter not only ensures the quality of your water but also prolongs the lifespan of your appliance.
This simple process can seem daunting, but it’s easier than most people think. With a few basic tools and some guidance, anyone can tackle this task with confidence. In this article, readers will discover step-by-step instructions to efficiently replace their Whirlpool water filter, ensuring they enjoy fresh, filtered water without the hassle.
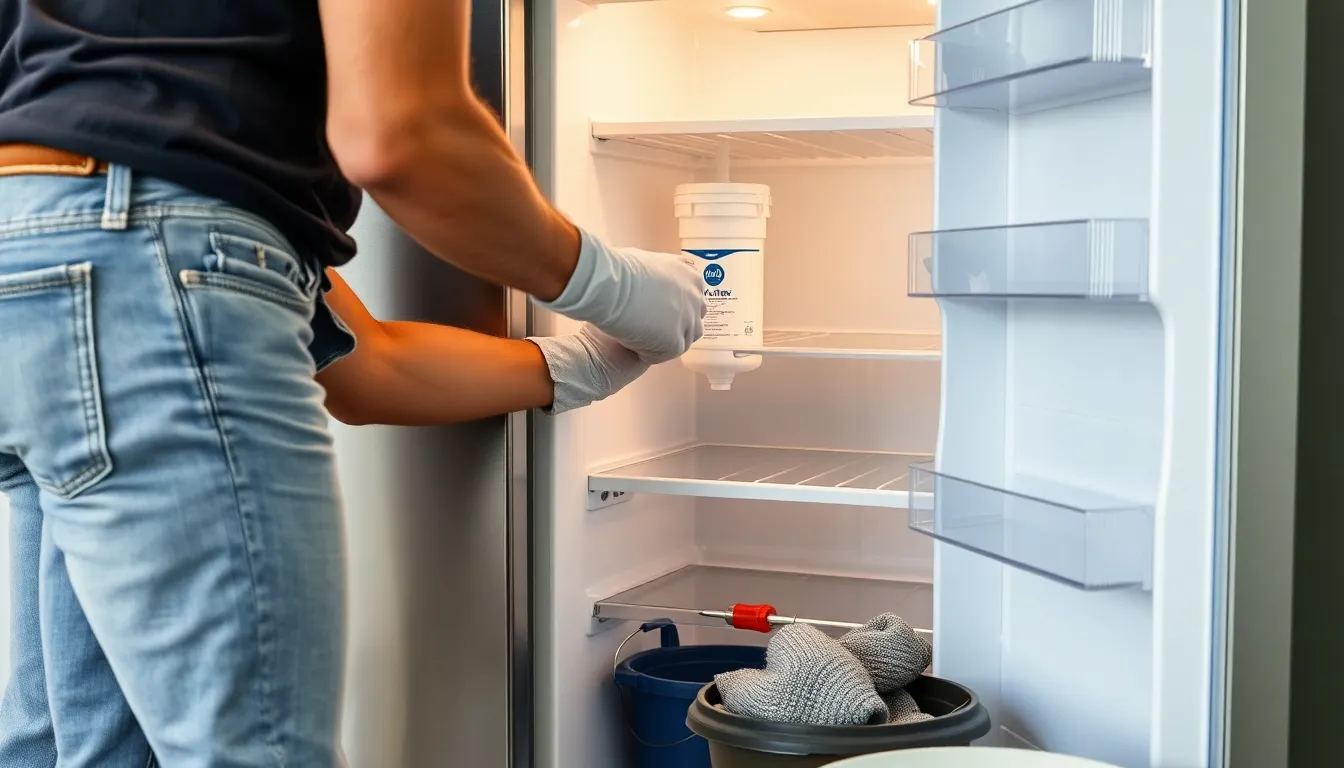
Tools Needed For Replacement
Replacing a Whirlpool water filter requires a few essential tools for efficient execution. Gather the following items before starting:
- Replacement Filter
Invest in a certified Whirlpool water filter compatible with your appliance model.
- Screwdriver
Use a flathead or Philips screwdriver, depending on the screws present on your refrigerator.
- Towel or Cloth
Keep a clean towel or cloth on hand to wipe away any water spills during the process.
- Pail or Bucket
Place a small pail or bucket beneath the filter housing to catch any excess water released during replacement.
- Gloves
Wear disposable gloves to maintain hygiene and protect hands from contaminants.
- Water Hose
A water hose may help in clearing out any remaining debris in the filter area.
Having these tools ready makes the water filter replacement smooth and hassle-free.
Steps To Replace Whirlpool Water Filter

Replacing a Whirlpool water filter involves a few straightforward steps. Following these instructions ensures clean, safe drinking water continues flowing in the household.
Locating The Water Filter
- Identify the filter compartment: Check the refrigerator or appliance manual for the specific location. Filters are typically found inside the refrigerator, near the bottom, behind a panel, or in the base grille.
- Open the compartment: If necessary, remove the cover or grille. Accessing the filter requires minimal effort and no special tools.
- Check for labels: Most Whirlpool models have labels indicating the filter type and replacement instructions. This information aids in selecting the correct replacement filter.
Removing The Old Filter
- Turn off the water supply: Ensure the water supply to the appliance is turned off to prevent spills during the process.
- Twist or pull the filter: Depending on the model, either twist the filter counterclockwise or pull it straight out. Handle it gently to prevent damage.
- Dispose of the old filter: Wrap the used filter in a towel and dispose of it properly. This step maintains hygiene and prevents accidental leaks.
- Check for water buildup: Wipe any excess water with a towel or cloth before proceeding to install the new filter.
Installing The New Filter
- Unpack the new filter: Remove any protective caps and packaging from the new Whirlpool water filter. Inspect it for any visible damage.
- Insert the filter: Align the filter with the compartment slot. Push it in firmly until it clicks or twists into place. Ensure it’s secure to prevent leakage.
- Turn on the water supply: Restore power to the water supply and check for leaks around the new filter. Tighten if necessary.
- Run water through the filter: Flush the new filter by running water for several minutes before use. This step clears out any air or debris, ensuring optimal performance.
Tips For Maintaining Your Water Filter
Maintaining your water filter ensures optimal performance and water quality. Regular care can extend the filter’s lifespan and improve safety.
Regular Checkups
Check the water filter every six months for signs of wear or discoloration. Inspect the filter compartment for any buildup of debris, leaks, or irregularities in performance. Replace the filter as recommended by the manufacturer, typically every six months to one year, depending on usage. Monitor water taste and clarity, as changes may indicate the need for immediate replacement.
Best Practices For Filter Replacement
- Choose Certified Filters: Use only certified replacement filters from Whirlpool or the manufacturer to ensure compatibility and effectiveness.
- Turn Off Water Supply: Always turn off the water supply before starting the replacement process to prevent leaks and spills.
- Follow Instructions: Adhere to the manufacturer’s instructions for replacing the filter, paying attention to the orientation and locking mechanisms.
- Flush the New Filter: After installation, flush the new filter for at least five minutes to remove any residual particles.
- Document Replacement Dates: Keep a record of replacement dates to maintain a consistent schedule for future replacements.
Replacing a Whirlpool water filter is a straightforward process that significantly contributes to maintaining clean drinking water. By following the outlined steps and ensuring all necessary tools are at hand, anyone can complete the task with ease.
Regular filter replacements not only enhance water quality but also prolong the life of appliances. Staying proactive about filter maintenance is key to enjoying safe and refreshing water. Keeping track of replacement dates and adhering to manufacturer guidelines will help ensure optimal performance. With a little care and attention, households can enjoy the benefits of clean water for years to come.